Part 3 - Azure AD Secured Azure Functions - Creating an Angular Client Application
Update 22Mar2019: This article refers to Azure Auth v1.0. Please see Marc LaFleur's v2 Endpoint & Implicit Grant article if you are looking to get started with the v2 endpoints and MSAL. See comments below for details.
- Part 1 - Creating an Azure Function with the Azure CLI 2.0
- Part 2 - Securing an Azure Function with Azure Active Directory
- Part 3 - Creating an Angular Client Application
- Part 4 - Adding Azure Active Directory Group Claims Checks
This is part three of a series of posts about consuming Azure Functions secured by Azure Active Directory.
The goal: create an Azure Function, secure it with Azure Active Directory, and use Angular to pull data back from the AAD secured Function. In Part 1 we created an Azure Function App and a basic Function. In Part 2 we secured our Azure Function using Azure Active Directory.
In this post we will create an Angular application which authenticates our users in Azure AD, and call our secured Azure Function. I am assuming the output of the previous two posts is available to start creating app in this post. If not, you may want to go through the first two posts and complete those steps. This is a bit of a long post, but all the code is available in GitHub.
Code: https://github.com/pkskelly/AzureFuncSecuredNGApp
The Angular CLI
I mentioned recently to a colleague that I don't get to "code in anger" as much as I would like, but I really enjoying trying to be a "learn it all". Part of the goal of this series was learn some new things, and the Angular CLI seemed like a good way to do that for the client application.
If you don't have the Angular CLI installed, head over to the Angular CLI page and follow the steps to install.
Create a New Project
To create a new project, start with the following:
ng new SecureApp --routing
Change directories into the new SecureApp folder and add some packages we will need using yarn (if you don't know what yarn is, learn how to migrate to it here).
yarn add adal-angular
yarn add @types/adal --save-dev
yarn add expose-loader
yarn add angular2-jwt
The first package will help us call Azure Active Directory and last package, the second package gives us intellisense for ADAL, the third package helps with loading the ADAL types in TypeScript, and the fourth will help us with the JWT tokens during the authentication flow.
Next, add some basic Components using the Angular CLI's aliases for creating components, I'll be skipping the test specs to reduce the clutter, don't do this in a real application.
ng generate component Home -module --no-spec
ng g c Golfer -module --no-spec
ng g c Login -module --no-spec
The first line is a full call to create a "Home" component, add that component to the app.module.ts, and exclude the test specs. The other calls use the Angular CLI aliases for the generate and component options respectively. We'll need that third component as part of our authentication. A better explanation is coming, but this gives us the structure we'll need for the UI.
Now we need something to hold our data model. Create a simple golfer interface for our data using the Angular CLI.
$ng g interface /models/Golfer
Now add the following interface definition for the Golfer.
export interface IGolfer {
  id: string;
  firstName: string;
  lastName: string;
  mail: string;
  address: string;
  city: string;
  state: string;
}
A Simple UI with Routing
Now, we need a simple UI to test the components we created previously. Open the /src/index.html file that ng cli created and add the following just before the closing </head> tag to get a basic bootstrap UI.
<link href="//maxcdn.bootstrapcdn.com/bootstrap/3.3.7/css/bootstrap.min.css" rel="stylesheet" />
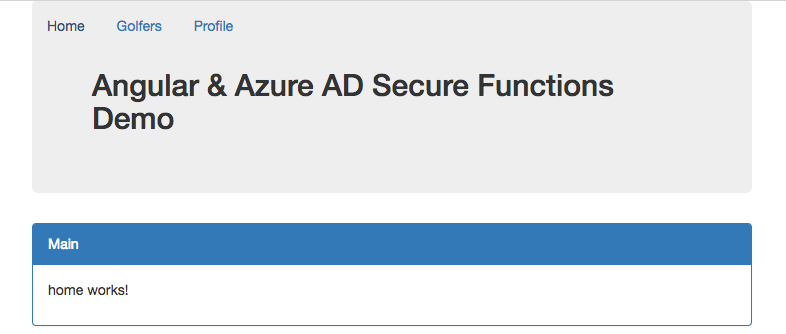
Replace the app.component.html contents with the following:
<div class="container">
  <nav class="navbar navbar-inner navbar-fixed-top">
    <div class="container">
      <div class="navbar-header">
        <button type="button" class="navbar-toggle" (click)="isCollapsed = !isCollapsed">
          <span class="sr-only">Toggle navigation</span>
          <span class="icon-bar"></span>
          <span class="icon-bar"></span>
          <span class="icon-bar"></span>
        </button>
        <span class="navbar-collapse">
          <ul class="nav navbar-nav nav-pills navBarPadding">

            <li>
              <a routerLink="/home">Home</a>
            </li>
            <li>
              <a routerLink="/golfer">Golfers</a>
            </li>
            <li>
                <a class="navbar-right" routerLink="/login">Profile</a>
              </li>
          </ul>
        </span>
      </div>
    </div>
  </nav>
  <div class="jumbotron">
    <h2>Angular & Azure AD Secure Functions Demo</h2>
  </div>
  <div class="panel panel-primary">
    <div class="panel-heading">Main</div>
    <div class="panel-body">
      <router-outlet></router-outlet>
    </div>
  </div>
</div>
Now that we have a UI, let's make sure we can navigate to the routes properly by updating the /src/app-routing.module.ts file with the following. Just replace the current const routes: Routes declaration with the following:
const routes: Routes = [
  {path: 'login', component: LoginComponent},
  {path: 'home', component: HomeComponent},
  {path: 'golfer', component: GolferComponent}
];
Since we are adding some components that the current file has not imported, simply import the components needed. If you are using Visual Studio Code simply type the component name, and Visual Studio Code will add the component automatically! Sweet!
Let's run the app to this point and make sure we see a little bit of the UI. This will open a browser and load our application to this point. Run the following in a terminal ng serve -o to start the Angular development server. You should be able to click on the navigation paths and see each link work at this point, no functionality, but the routes should work.
Add Authentication Services
Next we will add some services, some guards, and modules for the app to use for authenticating users. Again, I'm not adding the test specifications below to keep the code a little smaller (don't do this with real apps please!).
$ ng g service /services/Configuration --no-spec
$ ng g service /services/Adal --no-spec
$ ng g service /services/Golfer --no-spec
$ ng g module /services
$ ng g guard /services/Authenticated --no-spec
$ ng g module /services/authentication --flat true
$ ng g c LoginCallback --no-spec --inline-template --inline-style
$ ng g m LoginCallback
$ ng g g /LoginCallback/LoginCallback --no-spec -d
The above will create all the files we'll need to complete to handle configuring and calling our authentication service, a service to retrieve our data (golfer information) and a shared service module. The final two calls will generate an authentication guard and module to ensure our current user is authenticated.
Wiring up the Authentication
First, replace the contents for the configuration.service.ts with the following. This will provide the need configuration items for call our function and using the correct tenant and resource information.
import { Injectable } from '@angular/core';

@Injectable()
export class ConfigurationService {
    constructor() {
    }
        public get getConfiguration(): any {
        return {
            tenant: '[your_tenant_name]',
            tenantid: '[your_tenant_id]',
            clientId: '[your_apps_clientid]',
            redirectUri: window.location.origin + '/',
            postLogoutRedirectUri: window.location.origin + '/',
            endpoints: {
                /* 'target endpoint to be called': 'target endpoint's resource ID'  */
                // Custom Azure Function HTTP endpoint - example, replace with your Function Url
                'https://securefuncapp.azurewebsites.net/api': 'https://securefuncapp8.azurewebsites.net',
            },
                 //url of our function which will return our data
                 serviceUrl: 'https://securefuncapp8.azurewebsites.net/api/GetGolfers',
        };
    }

}
Next, add the following to the adal.service.ts file. This wraps the Adal library and injects the configuration service to authenticate our user and get our access token. Much of this code comes from Visahl Saroopchand's "Using ADAL with Angular, with some modifications.
import { ConfigurationService } from './configuration.service';
import { Injectable } from '@angular/core';
import 'expose-loader?AuthenticationContext!../../../node_modules/adal-angular/lib/adal.js';
import { Observable } from 'rxjs/Observable';
const createAuthContextFn: adal.AuthenticationContextStatic = AuthenticationContext;

@Injectable()
export class AdalService {

    private context: adal.AuthenticationContext;
    constructor(private configService: ConfigurationService) {
        this.context = new createAuthContextFn(configService.getConfiguration);
    }

    login() {
        this.context.login();
    }

    logout() {
        this.context.logOut();
    }

    handleCallback() {
        this.context.handleWindowCallback();
    }

    public get userInfo() {
        return this.context.getCachedUser();
    }

    public get accessToken() {
        return this.context.getCachedToken(this.configService.getConfiguration.clientId);
    }

    public get isAuthenticated() {
        return this.userInfo && this.accessToken;
    }
}
At this point, if you try to run the app, or use ng serve -o the Angular CLI will give you an error. The error is "ERROR in src/app/services/adal.service.ts(5,28): error TS2503: Cannot find namespace 'adal'. To resolve this error add the following to the top of the main.ts file.
///<reference path="../node_modules/@types/adal/index.d.ts"/>
While this works, I would love someone to leave a comment and explain why. Still trying to figure this one out. Credit to Hannes Neukermans for his StackOverflow answer and assistance with this issue.
Getting the returned Token
Since this is a Single Page App (SPA), we need a route in our SPA that can receive the authentication response. We created the login-callback.*.ts files to assist with this. First, we need a route that will receive the data.
Add the following route to the app-routing.module.ts file after our golfer route:
{path: 'id_token', component: LoginCallbackComponent, canActivate: [LoginCallbackGuard] }
The Adal library will launch a hidden iFrame and then this route can process the return result.
In order to receive the response from Azure AD when the user authenticates, we need an endpoint to which Adal can return data. Add the following to the login-callback.component.ts file. This will simply force us to the login page, or return us to the Home route if the Adal service has an authenticated user.
import { Component, OnInit } from '@angular/core';
import { Router } from '@angular/router';

import { AdalService } from '../services/adal.service';

@Component({
    template: '<div>Please wait...</div>'
})
export class LoginCallbackComponent implements OnInit {
    constructor(private router: Router, private adalService: AdalService) {

    }

    ngOnInit() {
        if (!this.adalService.userInfo) {
            this.router.navigate(['login']);
        } else {
            this.router.navigate(['home']);
        }
    }
}
Now we have a login-callback component to call after authenticating a user, and we have the route, but we also need a Guard to manage the call back and interact with the Adal library. Add the following to the login-callback.guard.ts we created.
import { Injectable } from '@angular/core';
import { Router, CanActivate, ActivatedRouteSnapshot, RouterStateSnapshot } from '@angular/router';
import { Observable } from 'rxjs/Observable';
import { AdalService } from './../services/adal.service';

@Injectable()
export class LoginCallbackGuard implements CanActivate {
    constructor(private router: Router, private adalService: AdalService) {  }

    canActivate(route: ActivatedRouteSnapshot, state: RouterStateSnapshot): boolean {

        this.adalService.handleCallback();

        if (this.adalService.userInfo) {
            localStorage.setItem('token', this.adalService.accessToken);
            const returnUrl = route.queryParams['returnUrl'];
            if (!returnUrl) {
                this.router.navigate(['home']);
            } else {
                this.router.navigate([returnUrl], { queryParams: route.queryParams });
            }
        } else {
            this.router.navigate(['login']);
        }

        return false;
    }
}
If the AdalService acquires a userInfo object, then we set the token in localStorage. Now we need to update the login-callback.module.ts and provide these components to the application. Replace the file content with the following:
import { NgModule } from '@angular/core';
import { CommonModule } from '@angular/common';
import { LoginCallbackComponent } from './login-callback.component';
import { LoginCallbackGuard } from './login-callback.guard';


@NgModule({
  imports: [
    CommonModule
  ],
  declarations: [LoginCallbackComponent],
  providers: [LoginCallbackGuard]
})
export class LoginCallbackModule { }
Finally, add our LoginCallbackModule to the list of imports in the app.module.ts. We now have all the components for our login call back flow.
Note: After I started down this path of using Adal, I ran across the MSAL library. Looking at this library, it seems a better candidate for Angular applications, but at this time there would still be some work to integrate as there is no Angular specific MSAL SDK or TypeScript definitions. Maybe a future blog post!
Adding the Authentication Guard to Routes
In order for the Adal service to authenticate our user, we need to enable the routes to have an authenticated Guard which will call the Adal library and start the authentication process.
Replace the authenticated.guard.ts file with the following. This implements Angular's CanActivate guard and will ensure that a user is authenticated before viewing a route or they will be routed to the login page.
import { Injectable } from '@angular/core';
import { CanActivate, ActivatedRouteSnapshot, RouterStateSnapshot, Router, NavigationExtras } from '@angular/router';
import { Observable } from 'rxjs/Observable';
import { AdalService } from './adal.service';

@Injectable()
export class AuthenticatedGuard implements CanActivate {

  constructor(private router: Router, private adalService: AdalService) { }

  canActivate(route: ActivatedRouteSnapshot, state: RouterStateSnapshot): Observable<boolean> | Promise<boolean> | boolean {
    const navigationExtras: NavigationExtras = {
      queryParams: { 'redirectUrl': route.url }
    };

    if (!this.adalService.userInfo) {
      this.router.navigate(['login'], navigationExtras);
    }

    return true;
  }
}
With this guard in place, add the following to the routes we want to protect by updating the routes. We'll update the app-routing.module.ts to the following:
{path: 'golfer', component: GolferComponent, canActivate: [AuthenticatedGuard] },
    {path: 'id_token', component: LoginCallbackComponent, canActivate: [LoginCallbackGuard] },
    {path: '', redirectTo: 'home', pathMatch: 'full'}
The HashLocationStrategy - Ensuring the Login Callback is Handled
Since we have a route for the location to return to, we also need to tell Angular that we expect this route to be invoked with a hash location, not a simple url location suffix. The useHash: true ensures that the url fragment returned will be processed and the id_token processed by our guard.
  @NgModule({
    imports: [RouterModule.forRoot(routes, {useHash: true})],
    exports: [RouterModule]
  })
  export class AppRoutingModule { }
Serving the Angular App as SSL
If you would like to serve the url from an SSL endpoint locally, be sure to update the angular-cli.json file and add the following to the defaults node. If you change this, you must also update the CORS hosts allowed in your Azure Function.
"serve": {
      "host": "localhost",
      "port": 3000,
      "ssl": true
    },
Running the Application
Open a terminal or press Crtl+` in Visual Studio Code to launch the Terminal. Start the application with the following to open a browser. Don't forget to update the configuration.service.ts file with your tenant and application information.
$ ng serve -o
One the browser opens, navigate to the Profile or Golfers tab, and then login. Once we call our GetGolfers function, we display the result in a simple grid.
Get the Code
For a working solution, grab the code from GitHub.
Up Next
There you have it, an authenticated user and calling an Azure Function from an Angular application! Coming up, Part 4 - Adding Azure Active Directory Group and Role Claims Checks, where I'll try to dive into some role and group management and access to our functions.
As always, leave me a comment below - HTH. Given the security nature of this post, if you see something that is incorrect, please let me know - but be constructive - and I will update accordingly!
A Final Thought on the Implicit Flow
While this all works, keep in mind that you are still using the OAuth Implicit Flow, and the tokens you receive still have some associated storage and transit risk. As I mentioned, I am still learning some of this, so if you know of better information or practice, leave a comment and let me know!
For a good discussion, see the What are the security risks of Implicit flow on StackOverflow. Also, to see a great recent session from Vittorio Bertocci, check out the Microsoft Ignite 2017 session BRK3225 - Office development: Authentication demystified. There is a discussion at 1:04:53 of the video which describe some of the SPA scenario and some of the risks associated.