Introduction
A recent side project to capture some data using LinkedIn API's required using the OAuth 2.0 Authorization Code flow for most of the API's. I initially used the docs PostMan sample to learn the API's, but I wanted to use ASP.NET Core for a simple UI to enable persisting the access and refresh tokens. Not only did I find a simple way to log in using LinkedIn OAuth, but learned at ton about ASP.NET Core authentication. I wanted to write this post in appreciation of the aspnet-contrib OSS contributors and for when I need to do this again!
The ASP.NET OAuth2.0 Providers
Out of the box, ASP.NET Core supports multiple external providers but not LinkedIn. The docs are excellent, and the same paragraph that mentioned external providers pointed me to the community contributed providers! The aspnet-contrib/AspNet.Security.OAuth.Providers is an aspnet-contrib (github.com) project with more than 60 external providers, including LinkedIn!
This post creates a simple solution using LinkedIn and GitHub providers to authenticate users. I use Visual Studio Code below, but using Visual Studio 2019 should work fine, you'll have to translate creating the project, managing packages, and more via the terminal in Visual Studio Code to Visual Studio proper.
Of course, you could clone and run the MVC client sample, but I learn best with hands on keyboard so I took the long road. I highly recommend a read of the ASP.NET Core Authentication docs and source code. I spent longer than I expected in the docs and source, but I learned SO MUCH! A big thanks to the AspNet.Security.OAuth.Providers project maintainers, and especially Martin Costello 🏳️🌈🇪🇺 (@martin_costello)) for the LinkedIn implementation and the assist.
Failure is an Option
As they say, security is hard and I thought I understood the OAuth 2.0 flows pretty well. However, my first attempt failed and as part of figuring out why, I logged an issue and started digging into the ASP.NET Core Authentication process. Dig into the AuthenticationBuilder if you want some great insight into what registering these providers is actually doing under the covers. The registration of providers was my question - how are they configured, added and consumed? And since they all have their own implementation idiosyncrasies, how are they handled?
That question was answered when I uncovered the OAuth/src code with all the abstractions that enable the OAuth providers. The OAuthExtentions.cs and the OAuthHandler.cs files really drove home how the provider model worked, and that helped me configure things properly. Failure often brings the best lessons, and this was true here! Some really excellent samples of the .NET Options pattern, delegates, generic type constraints, and so much more. Never give up, you never know what you'll learn! The complete sample code can be found in pkskelly/AspNetOAuthLinkedIn: Authenticating LinkedIn Users Using ASPNET-Contrib OAuth Providers (github.com)
Create an MVC Application
Open an instance of Visual Studio Code. Click Cmd+` to open the terminal. Navigate to your favorite code folder and run the following create a new folder for the project, a new empty MVC project, and an initial build to ensure a baseline works.
mkdir ASPNETOAuthLinkedIn
cd ASPNETOAuthLinkedIn
dotnet new mvc
dotnet build
I don't need any of the additional features that the --auth Individual option for the MVC project would provide, so I skipped that. Check that out if you want more options and user management capabilities.
Add the OAuth Providers
Next, add the providers we'll use, and add others to experiment with. We'll use LinkedIn and GitHub in our example. Run the following in your terminal.
dotnet add package AspNet.Security.OAuth.GitHub
dotnet add package AspNet.Security.OAuth.LinkedIn
Configure Authentication and Providers in Startup.cs
Next, we need to configure the providers, and this means configuring the options and adding to the services collection. See Getting Access to LinkedIn APIs and GitHub's Creating an OAuth App for creating the needed client id and secrets for your apps.
First, you need to ensure Authentication services configured with a default scheme, CookieAuthentication in our case.
services.AddAuthentication(options =>
{
  options.DefaultScheme = CookieAuthenticationDefaults.AuthenticationScheme;
})
Next, ensure the options for the cookie sign in and out are configured for our purposes, not the defaults. Dig into the source code if you want details on why and to where the defaults point.
.AddCookie(options =>
{
  options.LoginPath = "/signin";
  options.LogoutPath = "/signout";
})
And finally configure our providers. Since we want to hide out secrets, we get the values from Configuration.
.AddLinkedIn(options =>
{
  options.ClientId = Configuration["LinkedIn:ClientId"];
  options.ClientSecret = Configuration["LinkedIn:ClientSecret"];
  // your scopes may vary, see https://developer.linkedin.com/docs/oauth2#scopes
  options.Scope.Add("r_liteprofile");
  options.Scope.Add("r_emailaddress");
  options.Scope.Add("r_organization_social");
  options.Scope.Add("w_organization_social");
  options.Scope.Add("rw_organization_admin");
  options.SaveTokens = true; //<-- this is the important line if you wat to use the tokens
})
.AddGitHub(options =>
{
  options.ClientId = Configuration["GitHub:ClientId"];
  options.ClientSecret = Configuration["GitHub:ClientSecret"];
  options.Scope.Add("user:email"); // --> we just want to log these in as a test
  options.SaveTokens = true; //<-- this is the important line if you wat to use the tokens
});
The scopes you need/use may vary from those above. For the LinkedIn scopes, I am getting some organizational data so I have additional scopes. For GitHub, I am only adding the single scope above for demo purposes.
After the ConfigureServices changes are complete, we need to ensure we update the Configure method with the following to ensure the Authentication service is configured:
app.UseAuthentication();
app.UseAuthorization();
The UseAuthentication extension method configures the AuthenticationMiddleware.cs and ensures our authentication schemes will redirect to the correct endpoints. If you skip this step, you will get an error indicating that the /signin-<scheme name> cannot be found.
Add Provider Configuration to appsettings.Development.json
Add the provider settings to the appsettings.Development.json file. Be sure to change to your own information from the apps that you registered for a given provider from the steps mentioned above.
"LinkedIn": {
   "clientId": "447thy21b7spef",
   "clientSecret": "S46JHDhjs839937JDHD",
},
{
"GitHub": {
   "clientId": "83993jd889374",
   "clientSecret": "46cffba4e0e522cc3405ba532d125489113a7e"
}
Enable SignIn and SignOut MVC Routes
Create new AuthenticationController.cs file in the Controllers folder of the MVC app.
Since we overrode the endpoints that handle logging users in and out of the MVC app (our AddCookies options changes) we need to create those endpoints. The simplest path here is to copy the contents of the AuthenticationController.cs ) file from the sample project.
You'll need to modify namespaces based on your project name. Most of the code is straight forward, but the next step explains one of the important bits.
Enable Locating our Providers and SignIn/SignOut
The AuthenticationController needs to provide a list of providers to the SignIn view. Extension methods on the HttpContext enable this, but we need to create them. Create an Extensions folder, and add an HttpContextExtensions.cs file. Again, the simplest route here is to copy/paste the HttpContextExtensions.cs content from the sample.
The GetExternalProvidersAsync() extension enables finding all the schemes registered at startup. If you dig into the source, you'll find that each provider we register is added to the AuthenticationSchemeProvider.cs schemes collection. The extension methods allow us to query the schemes, and once we have these, the [HttpGet("~/signin")] endpoint can use these as the @Model to display the login providers.
Once we select the provider, the [HttpPost("~/signin")] endpoint uses the IsProviderSupportedAsync() extension to call the challenge url for the given provider, enable user login and scope approval, and redirect to the return url.
The [HttpGet("~/signout")] and [HttpPost("~/signout")] methods of the controller simply call the default SignOut of the ControllerBase passing in our CookieAuthenticationDefaults scheme.
Add a View for Authentication
With the schemes we registered discovered, we need a view in which the schemes can be displayed. Create a Views/Authentication folder. Create a SignIn.cshtml file in the new folder and add the following code (or copy/paste from SignIn.cshtml).
@using Microsoft.AspNetCore.Authentication
@model AuthenticationScheme[]

<div class="jumbotron">
   <h1>Authentication</h1>
   <p class="lead text-left">Sign in using one of these external providers:</p>

   @foreach (var scheme in Model.OrderBy(p => p.DisplayName))
   {
     <form action="/signin" method="post">
       <input type="hidden" name="Provider" value="@scheme.Name" />
       <input type="hidden" name="ReturnUrl" value="@ViewBag.ReturnUrl" />

       <button class="btn btn-lg btn-success m-1" type="submit">Connect using @scheme.DisplayName</button>
     </form>
}
</div>
The magic here is the AuthenticationScheme[] array from the [HttpGet("~/signin")] route and extension method. A form for each scheme with a button, scheme name and return url are all provided to enable using whatever available scheme a user wants to use.
Replace Index.cshtml
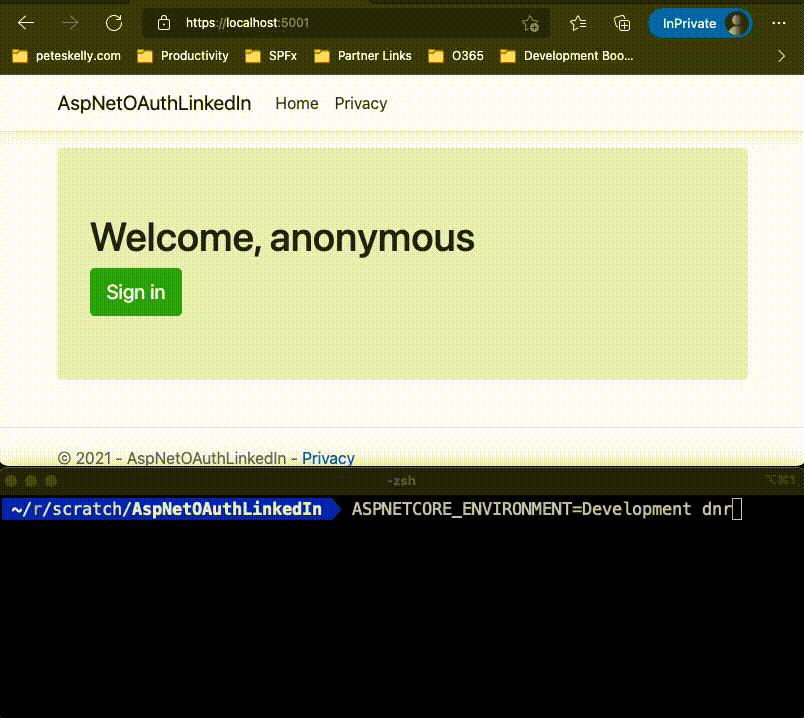
Since we want to see proof of our authentication replace the contents of Index.cshtml with the following to list the claims from the provider the user authenticated with:
<div class="jumbotron">

@if (User?.Identity?.IsAuthenticated ?? false)
{
   <h1>Welcome, @User.Identity.Name</h1>
   <p>

   @foreach (var claim in Context.User.Claims)
   {
      <div><code>@claim.Type</code>: <strong>@claim.Value</strong></div>
   }
   </p>
   <a class="btn btn-lg btn-danger" href="/signout?returnUrl=%2F">Sign out</a>
}
else
{
   <h1>Welcome, anonymous</h1>
   <a class="btn btn-lg btn-success" href="/signin?returnUrl=%2F">Sign in</a>
}
</div>
Caching Tokens
There is caching available to ASP.NET for tokens, but persisting tokens and refreshing is out of scope for this conversation. However, I did mention my use case. My end goal was scheduled LinkedIn data collection using Azure Functions. In my case, storing the access and refresh tokens in Azure Table Storage was the simplest approach for now.
This step is not necessary, but for demonstration purposes, one way to obtain access and refresh tokens is via the HttpContext. I replaced the Index method with the following to ensure I see them when debugging. You'll need to update the using statements to get the GetTokenAsync() method.
[HttpGet("~/")]

public async Task<ActionResult> Index()
{
   var accessToken = await HttpContext.GetTokenAsync("access_token");
   // DO NOT LEAVE THIS CODE IN YOUR SOLUTION!!
   _logger.LogCritical("Access token: {AccessToken}", accessToken);
   return View();

}
This just ensures that when we debug, we can see the access_token and refresh_token values.
To write them to the tokens to Azure Table Storage I am using the latest Azure Tables client library for .NET. My sample does not implement this, but the code below is just an authorized route that updates a TableEntity so I can read the tokens from Azure Functions.
var accessToken = await HttpContext.GetTokenAsync("access_token");
var refreshToken = await HttpContext.GetTokenAsync("refresh_token");


var connectionString = _configuration.GetConnectionString("StorageAccount");
var tableName = _configuration.GetValue<string>("LinkedIn:KeysTableName");
int daysUntilExpiry = _configuration.GetValue<int>("LinkedIn:ExiprationInDays");
var created = DateTime.UtcNow;
var entity = new LinkedInOAuthToken()
{
   PartitionKey = User.Identity.AuthenticationType,
   RowKey = User.Identity.Name,
   AccessToken = accessToken,
   RefreshToken = refreshToken,
   CreatedAt = created,
   Expires = created.AddDays(daysUntilExpiry)
};


var tableClient = new TableClient(connectionString, tableName);
await tableClient.CreateIfNotExistsAsync();

tableClient.UpsertEntity<LinkedInOAuthToken>(entity);
Run the Solution and Login
Run the solution and login to the providers you have listed.
Conclusion
I learned a helluva lot going through this code. I love this kind of learning! Reading code like the ASP.NET Core Authentication, OAuth and aspnet-contrib providers make you realize how awesome some abstractions can be! And reading good code is never a bad thing.
Finding all these providers, and realizing how easy this makes authenticating to many different social providers has given me a whole bunch of ideas! I might dig into the Azure DevOps provider, or maybe MSAL.NET, and use the DevOps API for some other reporting.
This post was a definitely a breadcrumb for my future self, but it may help someone else. As always, HTH and feel free to let me know in the comments below or Tweet at me!