Creating an Azure Function with the Azure CLI 2.0
- Part 1 - Creating an Azure Function with the Azure CLI 2.0
- Part 2 - Securing an Azure Function with Azure Active Directory
- Part 3 - Creating an Angular Client Application
- Part 4 - Adding Azure Active Directory Group Claims Checks
This is Part 1 of a multi-part post about consuming Azure Functions secured by Azure Active Directory. I have been using Office 365 applications with OAuth tokens for a while, but wanted to dive a bit deeper and learn some of what is going on behind the scenes. While I learned a lot for this series, and it may not be an exact match to all of the workings of an Office 365 authentication and authorization flow, this exercise was a lot of fun.
To get an Azure Function set up quickly, I used the Azure CLI 2.0. You will need an Azure Subscription for this series of posts, so if you don't have one, go get one now!
Creating an Azure Function App from the CLI
Step one in securing an Azure Function is, you guessed it, creating an Azure Function to secure. I've used the Azure CLI and ARM Templates in the past, but with the recent upgrade to the Azure CLI 2.0, I wanted to try something new.
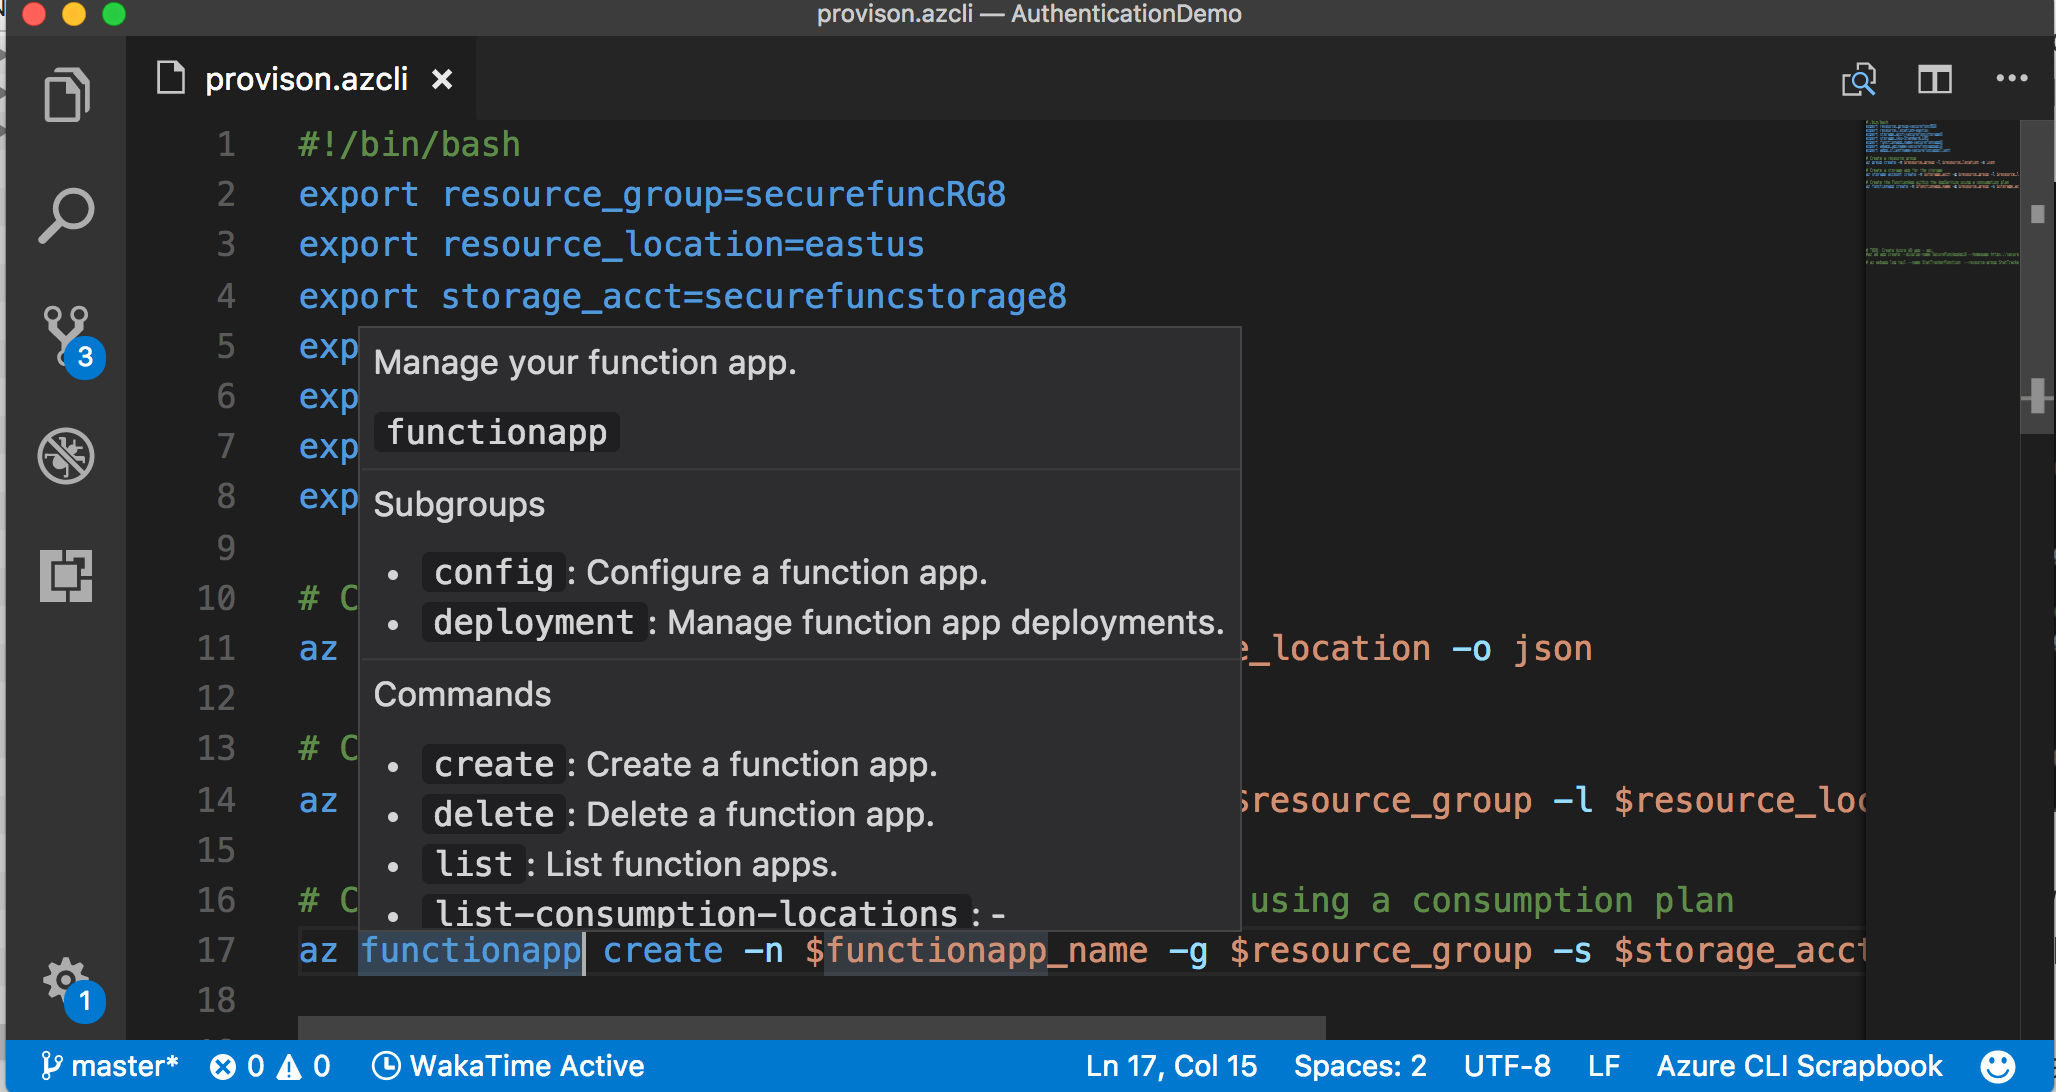
The first thing I found was the Azure CLI Tools for Visual Studio Code. This makes creating a script in Visual Studio Code super simple - intellisense for a command line interface, just awesome! Intellisense for the commands and even full documentation in VS Code as popup information!
I am using Mac, so the code below can be called as shell script, but a PowerShell script would work just as well.
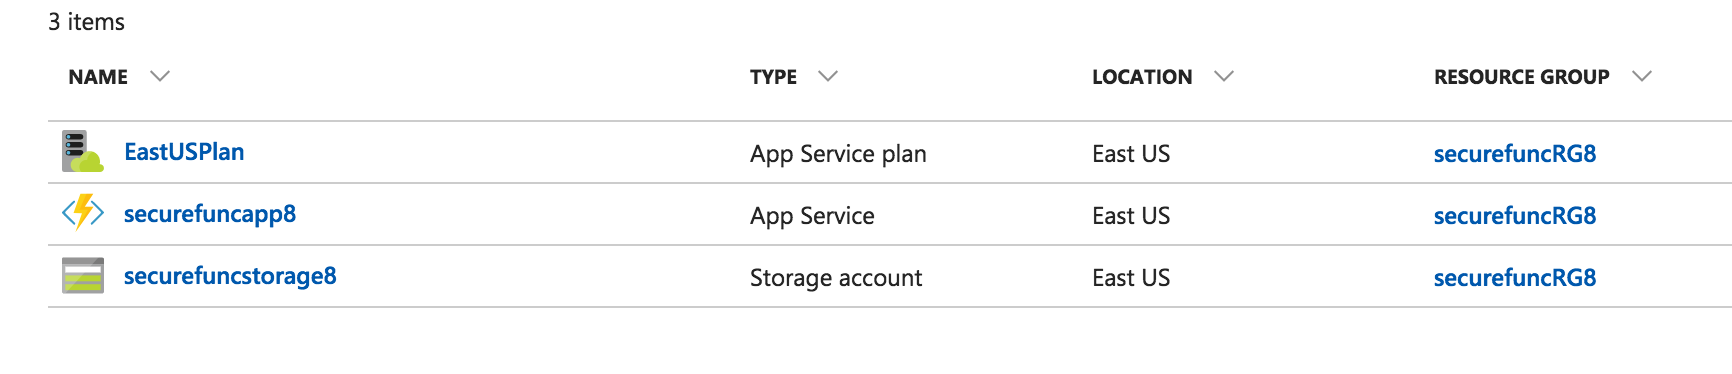
In the end, the CLI commands create the base resources we need, including:
- a resource group
- a storage account
- an Azure Function App
#!/bin/bash
export resource_group=securefuncRG8
export resource_location=eastus
export storage_acct=securefuncstorage8
export storage_sku=Standard_LRS
export functionapp_name=securefuncapp8
export adapp_apiname=securefuncappapi8
export adpp_clientname=securefuncappclient8

# Create a resource group
az group create -n $resource_group -l $resource_location -o json

# Create a storage app for the storage
az storage account create -n $storage_acct -g $resource_group -l $resource_location --sku $storage_sku --output json

# Create the FunctionApp within the AppService using a consumption plan
az functionapp create -n $functionapp_name -g $resource_group -s $storage_acct -c $resource_location --output json
One of the best finds in the Azure CLI is the ability to access the steaming logs for a given web app. For example, the following call will access the streaming logs for the webapp specified. This will come in handy for upcoming posts about securing the Function with which we will be working.
az webapp log tail --name securefuncapp8 --resource-group securefuncRG8
Adding a HTTP Function to be our WebAPI
Finally, let create a Function to serve as our WebAPI. Then we will add some simple code to our Function to return a small set of data.
As the video below shows, perform the following:
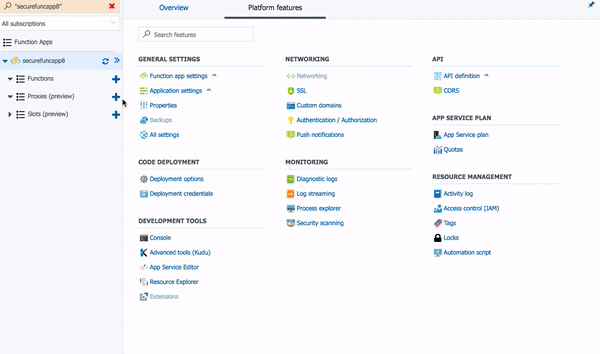
- Click on your Azure Function in the Resource Group list (above)
- Click on the + next to the Functions menu item
- Click Custom function* so we can name our Function
- Click HttpTrigger - C# and then name your function
- Change the Authorization level to Anonymous
- Click Create
Once the new Function is created, click on the function name to open the run.csx file in the code window. Replace the code in the existing function's run.csx file with the following:
#r "Newtonsoft.Json"

using System.Net;
using Newtonsoft.Json;

public static async Task<HttpResponseMessage> Run(HttpRequestMessage req, TraceWriter log)
{
    List<Golfer> golfers = new List<Golfer>();
    golfers.Add(new Golfer ()
    {
        Id="1",
        FirstName = "Gerry",
        LastName = "Millwood",
        Email="gmillwood@acme.com",
        Address="1234 Sycamore Lane",
        City="Tucker",
        State="GA"
    });
    golfers.Add(new Golfer ()
    {
        Id="2",
        FirstName = "Karla",
        LastName = "Dressel",
        Email="kdressel@acme.com",
        Address="1234 Sycamore Lane",
        City="Tucker",
        State="GA"
    });
    golfers.Add(new Golfer ()
    {
        Id="3",
        FirstName = "Tony",
        LastName = "Tomasetti",
        Email="ttomasetti@acme.com",
        Address="1234 Sycamore Lane",
        City="Tucker",
        State="GA"
    });
    golfers.Add(new Golfer ()
    {
        Id="4",
        FirstName = "Dylan",
        LastName = "Meyer",
        Email="dmeyer@acme.com",
        Address="1234 Sycamore Lane",
        City="Tucker",
        State="GA"
    });
    return  req.CreateResponse(HttpStatusCode.OK, golfers, "application/json");
}


public class Golfer {

  [JsonProperty(PropertyName="id",NullValueHandling=NullValueHandling.Ignore)]
  public string Id {get; set;}

  [JsonProperty(PropertyName="firstName")]
  public string FirstName {get; set;}

  [JsonProperty(PropertyName="lastName")]
  public string LastName {get; set;}

  [JsonProperty(PropertyName="email",NullValueHandling=NullValueHandling.Ignore)]
  public string Email {get; set;}

 [JsonProperty(PropertyName="address",NullValueHandling=NullValueHandling.Ignore)]
  public string Address{get; set;}

  [JsonProperty(PropertyName="city",NullValueHandling=NullValueHandling.Ignore)]
  public string City {get; set;}

  [JsonProperty(PropertyName="state",NullValueHandling=NullValueHandling.Ignore)]
  public string State {get; set;}

}
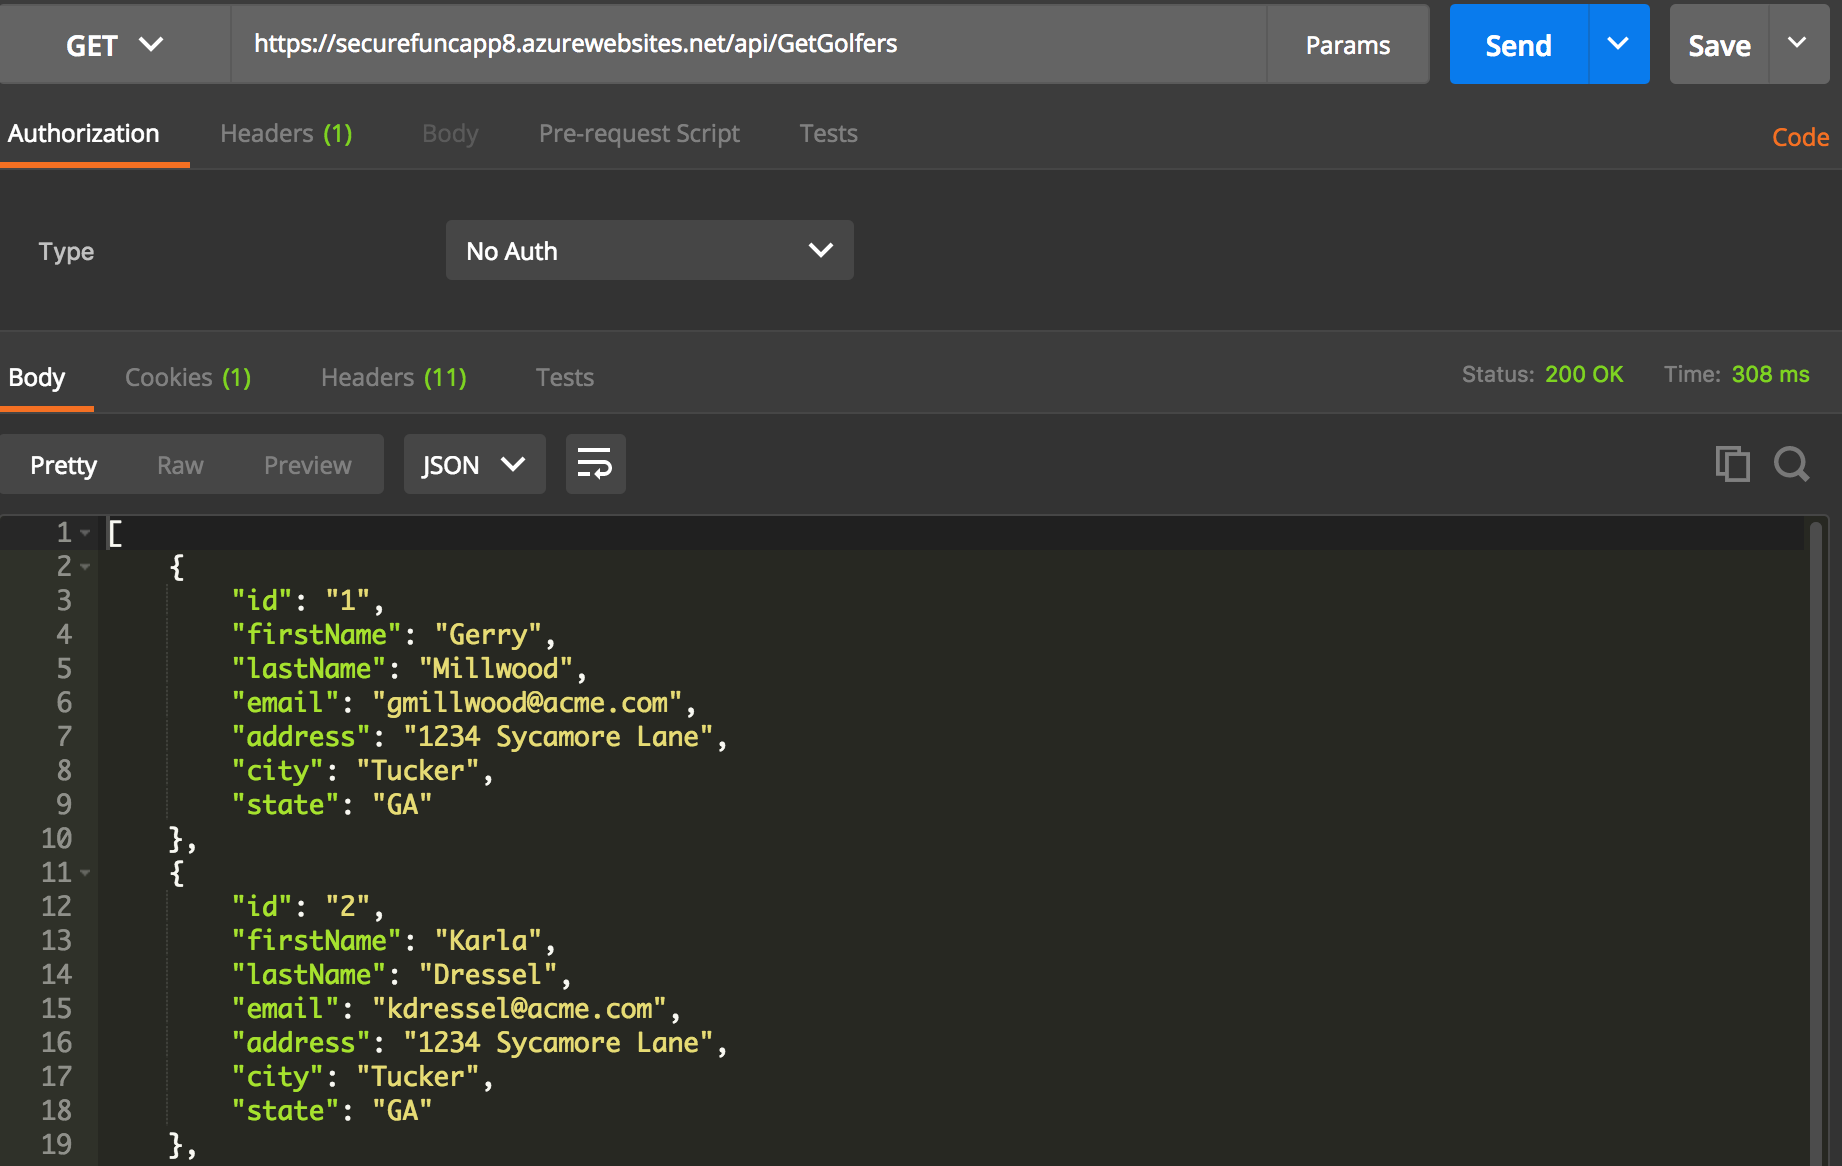
Click the Save and Run button in the function design pane. You should see the Output indicate a status 200 with the JSON formatted out put.
Test with Postman to ensure our function still works, click the Get function url link at the top of the page and copy the function link.
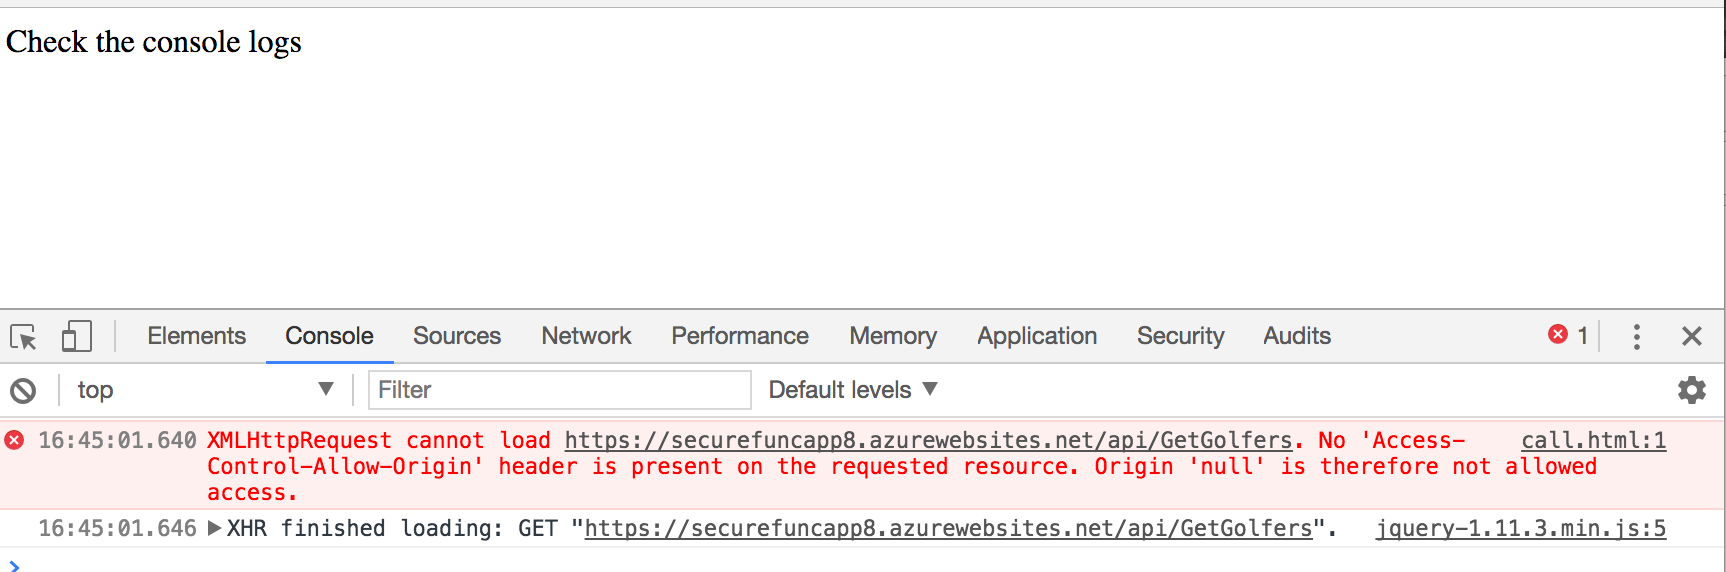
Note: If you try to call the function using javascript from an HTML page like below now, you will get a Cross Origin error (Access-Control-Allow-Origin) Since we have not enables CORS yet. We'll do this as part of a series of changes in Part 2.
If you want to try it and see, create an HTML file, and paste int the following code (replace your function Url as needed).
<!DOCTYPE html>
<html lang="en">

<head>
  <meta charset="UTF-8">
  <meta name="viewport" content="width=device-width, initial-scale=1.0">
  <meta http-equiv="X-UA-Compatible" content="ie=edge">
  <title>Simple JavaScript call</title>
  <script src="http://code.jquery.com/jquery-1.11.3.min.js"></script>
</head>

<body>
  Check the console logs...
  <table id="players">
  </table>
  <script>
    var settings = {
      "async": true,
      "crossDomain": true,
      "url": "https://securefuncapp8.azurewebsites.net/api/GetGolfers",
      "method": "GET"
    }

    $.ajax(settings).done(function (response) {
      $(function() {
        $.each(response, function(i, item) {
            var tr = $('<tr>').append(
                $('<td>').text(item.id),
                $('<td>').text(item.firstName),
                $('<td>').text(item.lastName)
            ).appendTo('#players');
            console.log(item);
        });
    });    });
  </script>
</body>

</html>
You can then open this file, hit Cmd+Option+I to open the developer tools and check out the Console. You should see this error.
Coming up, Part 2 - Securing an Azure Function with Azure Active Directory.
As always, leave me a comment below - HTH.